

How to Clean Candle Jars: A 2026 Step-by-Step Guide
Table of Contents
- Why Clean Candle Jars? (And Why It Matters for Wax Melt Lovers)
- What You'll Need Before You Start
- Step-by-Step: How to Clean Candle Jars with Boiling Water
- The Freezer Method: How to Get the Last Bit of Wax Out
- Oven Melting Method for Stubborn Wax Residue
- How to Remove Candle Labels and Adhesive Residue
- How to Clean Wax Melt Warmers (Not Just Jars)
- Repurposing Candle Jars: Upcycle and Reuse
- Frequently Asked Questions
Last Updated: September 23, 2026
Why Clean Candle Jars? (And Why It Matters for Wax Melt Lovers)
Learning how to clean wax melt containers properly keeps your home smelling fresh and your glassware safe to reuse. At Ruby Creek Candle Co., we hear from customers who want to get every last bit of value from their containers.
What You'll Need Before You Start
Gather your supplies first so you are not scrambling mid-task.
Basic supplies:
- Butter knife or old spoon
- Dish soap and warm water
- Baking soda
- Isopropyl alcohol
- Clean cloths or paper towels
- Heat-resistant gloves
For tougher jobs:
- Hair dryer
- Freezer space
- Oven-safe baking sheet
Step-by-Step: How to Clean Candle Jars with Boiling Water
The boiling water method is the fastest way to clean wax melt containers with heavy wax buildup.
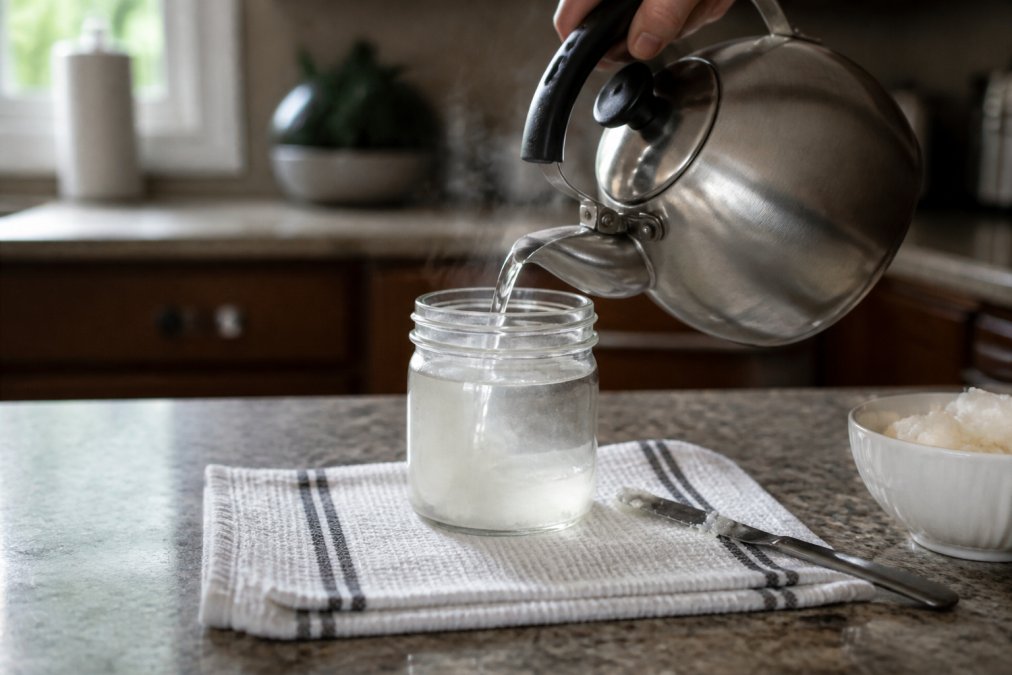
Here is how it works:
- Freeze the container first for 30 minutes. Cold wax shrinks and pulls away from the glass.
- Pop out the wax with a butter knife. It should come out in one chunk.
- Boil water and let it cool for two minutes. Near-boiling is safer than rolling boil.
- Pour the water into the container, filling it about three-quarters full.
- Wait 10 minutes. Old wax residue rises to the surface.
- Skim off the wax with a spoon once it hardens on top.
- Wash with soapy water and a soft cloth.
Safety First: Avoiding Thermal Shock
Thermal shock happens when glass goes from very cold to very hot too fast, expanding unevenly until it shatters. Prevent it with three habits:
- Never pour boiling water into a frozen container. Let it reach room temperature first.
- Place the container on a towel, not a cold stone counter.
- Add a metal spoon to the container before pouring. It absorbs some heat.
The Freezer Method: How to Get the Last Bit of Wax Out
The freezer method is the easiest approach for wax melt containers with a thick wax layer, since cold makes wax brittle and releases it from the sides.
Follow these steps:
- Put the container in the freezer for 1 to 2 hours.
- Take it out and let it sit for 5 minutes.
- Press the wax with your thumb. It should crack and lift.
- Pull out the wax chunk with a butter knife.
- Wipe the inside with a paper towel.
- Wash with warm soapy water.
Oven Melting Method for Stubborn Wax Residue
The oven method handles the worst cases: scorch marks, baked-on wax, and wax melt containers where every other trick has failed.
How to do it safely:
- Heat the oven to a low setting, around 90°C (200°F).
- Line a baking sheet with foil or parchment.
- Place containers upside down on the sheet.
- Bake for 15 to 20 minutes.
- Remove carefully with oven mitts.
- Wipe out the melted wax with paper towels.
- Wash with dish soap once cool.
| Method | Best For | Time Needed | Heat Risk |
|---|---|---|---|
| Boiling water | Heavy wax buildup | 20-30 min | Medium |
| Freezer | Thick wax layers | 1-2 hours | Low |
| Oven | Stubborn residue | 20-30 min | High |
| Hair dryer | Quick touch-ups | 5-10 min | Low |
How to Remove Candle Labels and Adhesive Residue
Labels are often the last thing standing between you and a clean jar. The adhesive on most wax melt containers is a pressure-sensitive acrylic or rubber-based glue that behaves differently depending on the surface underneath, which is why treating every container the same leaves a sticky, lint-covered film.
Match the Method to the Material
Glass containers: The most forgiving surface. Use heat, oil, alcohol, or a scraper, as long as you avoid sudden temperature swings. Warm the label with a hair dryer on low for 30 to 45 seconds, then peel from a corner at a shallow angle. If it tears, reheat and keep going.
The Residue That Comes After the Label
Once the paper is off, you are usually left with a gummy film. Work from gentlest to strongest:
- Warm soapy water soak for 15 to 20 minutes. This lifts water-based adhesives and softens the rest.
- Baking soda paste (three parts baking soda, one part water). Rub in a circle with your thumb. The mild abrasive grabs the glue without scratching glass.
- Isopropyl alcohol on a cotton pad. Let it sit on the adhesive for 30 seconds before wiping. This is the most reliable single step for acrylic adhesives.
- Cooking oil or baby oil. Oil breaks the bond on rubber-based glues. Apply, wait five minutes, then wash with dish soap to remove the oil film.
- Citrus-based adhesive remover. Reserve this for glass only, and rinse thoroughly afterward so no solvent residue transfers to your next melt.
Fragrance Oil Film on the Outside
How to Clean Wax Melt Warmers (Not Just Jars)
Knowing how to clean wax melt warmers keeps the scent strong and the unit safe.
For electric warmers:
- Unplug the unit and let it cool completely.
- Pop out the cooled wax with a butter knife.
- Wipe the dish with a paper towel.
- Wash with warm soapy water.
- Dry fully before plugging back in.
For tea light warmers:
- Let the wax cool and harden.
- Lift it out in one piece.
- Wipe the dish clean.
- Check the metal base for soot buildup.
Cleaning Electric and Tea Light Warmers
The metal base on a tea light warmer collects soot that can transfer a smoky smell to your next melt, so wipe it with a damp cloth and a drop of dish soap every few uses. For electric warmers, never submerge the base, only the removable dish gets wet, and a damp cloth is enough for the heating element. For a stubborn fragrance oil film, wipe with isopropyl alcohol.
Repurposing Candle Jars: Upcycle and Reuse
Once the container is clean, deal with what is left over: the wax itself and any metal wick tab at the bottom. Most guides skip both, and both cause real problems.
Eco-Friendly Disposal of Leftover Wax
Do not pour melted wax down the drain, it solidifies as it cools and coats the inside of pipes, narrowing them over time.
Here is what to do instead:
- Let it cool completely, then wrap the solid chunk in newspaper or a paper bag and place it in the regular trash. This is the simplest and most widely accepted option.
- Soy, coconut, and other plant-based waxes are biodegradable, but that does not mean they belong in the sink. Some municipal green bin and organics programs accept small amounts of plant-based wax, but rules vary widely by municipality. Check your local waste authority's guidelines before adding wax to organics.
- Paraffin and blended waxes should go in the regular trash. They are petroleum-derived and not accepted in organics programs.
- Reuse clean wax chunks in a wax melt warmer if they still carry scent. Break them into small pieces and store them in a sealed bag away from heat and sunlight.
Troubleshooting a Stuck or Rusted Wick Tab
If repurposing a former candle container, the metal wick tab is the small disc glued to the bottom. After a few melts it can stick fast, and in humid conditions it can rust and stain the glass.
If the tab is stuck:
- Freeze the container for 30 to 60 minutes. The adhesive holding the tab often becomes brittle.
- Slide a butter knife or flat plastic scraper under the edge and twist gently. Do not pry upward, or you risk chipping the glass.
- If it still will not budge, drip a few drops of isopropyl alcohol around the base of the tab and wait two minutes. This softens most adhesives.
- For a rusted tab, soak the container in warm water with a tablespoon of baking soda for 20 minutes, then scrub with a non-scratch pad.
Reuse Ideas That Hold Up
- Makeup brush holders
- Cotton ball or Q-tip jars in the bathroom
- Small plant pots for herbs, with a layer of pebbles at the bottom for drainage
- Desk organizers for pens, clips, and small tools
- Coin jars
- Bath salt or bath bomb storage, since glass does not react with the salts
Frequently Asked Questions
Why do candle jars go black?
Candle jars go black from soot and scorch marks, usually caused by a wick that's too long or burning the candle for too many hours at once. The carbon particles settle on the glass. To clean candle jars with soot, make a paste of baking soda and water, scrub gently with a soft cloth, then wash with soapy water. For stubborn black marks, a little isopropyl alcohol on a cloth can help lift residue without scratching the glass.
How do you get dried candle wax off glass?
The freezer method works best for dried wax. Place the jar in the freezer for 30 to 60 minutes. The wax shrinks and hardens, making it easy to pop out with a butter knife or your fingers. For thin films of wax residue, pour boiling water into the jar and let it sit until the wax floats to the top. Never use a knife to scrape forcefully, as you can scratch the glass or crack it.
Is it safe to put candle jars in the dishwasher?
Most candle jars are not dishwasher safe. The high heat and harsh detergents can cause thermal shock, leading to cracks or shattering. They can also damage any adhesive labels or decorative finishes. Hand washing with warm soapy water and a soft sponge is safer. If you must use a dishwasher, check the jar for a dishwasher-safe symbol first. Even then, avoid the heated dry cycle to protect glass integrity.
How do you remove stubborn candle labels from glass?
Start by heating the label with a hair dryer on low for 30 to 60 seconds. The adhesive softens, letting you peel it off slowly. For leftover residue, apply isopropyl alcohol or a citrus-based solvent like Goo Gone. Let it sit for a minute, then scrub with a cloth. For fragrance oil residue that lingers after label removal, wash the jar with warm soapy water and a tablespoon of baking soda to deodorize.
Cleaning candle jars and warmers takes a little effort, but it protects your glassware and keeps every scent crisp. At Ruby Creek Candle Co., we craft handcrafted wax melts designed to fill your space with clean, lasting fragrance. Our artisanal melts are made for anyone who wants a warm, welcoming home without the fuss of wicks and soot. Get started with Ruby Creek Candle Co. and give your space the scent it deserves.